Followers

Sunday, October 3, 2010

The big move... and some chimneys

The deluge last week prompted me to bring the house inside where it should remain dry. I had been thinking for a while I would like to do this, but didn't think there would be room without tripping over it and all its accompanying tools and necessary (and not so necessary bits) in our very small cottage.  Lots of measuring and a visit to the local op shop produced the perfect cupboard which suddenly made it possible. Aren't the handles gorgeous! I'm not normally a retro person, but they make me smile.

It is just perfect for storing everything as well, so I'll show off the tidy insides as well.
Isn't that lovely and organised!
... on the opposite side of the room on the desk/ work area is where everything gets dumped 
EEK!
I am so pleased to have it inside now and only regret I hadn't done it before Winter.


During the week previously I had been working on the chimneys which was probably a bit premature as I don't actually have a roof on most of the house, but one was needed for working the roof out, so to make sure they match I did both. Once again I used the  china doll egg carton bricking method and after looking at pictures of chimney pots on google I decided to go for an eclectic mix modified from some I had bought previously from the Dollshouse Emporium 
These were easy to work with, although they still look like painted wood. They aren't glued down yet so I might play some more with them.

The smaller chimney will be moving to main roof when I build one and hopefully should end up approximately the same height.

I found the chimneys really thrilling to make. All storybook cottages have a chimney, but most of the houses I have lived in have missed this important detail. It was a step closer to my dream home.

 On the home front, September is our family's busy birthday month so I have saved a piece of birthday cake for all my new followers (and old if you are happy to have 1:12 size serves)

Welcome to:
Natasha from the DHE forum. Natasha is new to dollshousing but a whizz at miniatures, especially polymer clay. Go and look at her tutorial for chocolate cake - you will begin salivating! (Well I do anyway)

From Italy is Francesca and her gorgeous minature cross stitches and tapestries. I love the happy colours and themes.

Casita Minis blog is a feast of photos. I suspect that she has made everything herself, although it isn't clear, which makes her one very talented lady! You need to see the tiny tiny crochet dresses.

Annemineli has several blogs. I'm still puzzling over what language to suggest to google translate so am not sure if any are associated with miniatures, but she does seem to enjoy artistic pursuits. Once again it is brought to me how the internet is joining the world in friendship. Dantel Deryasi , Yuzyazar and Annemin Eli.

Casey's minis is a blogger I found even before I started on my miniature journey. I love how she tells her stories through Tessie (or how Tessie blogs through Casey!) and am thrilled she has come to visit.

Paul Smith isn't showing up with a blog but I am 99% sure he is Afan Valley Miniatures whose blog I began following after a recommendation from Lainie.  I can only say Wow! Visit his page for the beginnings of his reproduction of Margam Castle and keep in mind that he does commissions!

Robin is another new to blogging but experienced in minis. She creates dolls with real character and you can meet them at Coombe crafts.blogspot and have the ones you fall in love with move into your own little house.

j lil roomer  sounds like she leads the same hectic life so many of us have (are the ones who appear serene really so, or are good at creating that impression, I wonder?) Her blogging has been a bit sporadic, but encouraging is that you can come back to a problem months later and solve it! And excellently at that.

Mini Maker can be found in several places, another being her website full of tips for miniaturists My Small Obsession. Both are well worth visiting for inspiration especially for those starting out (and I love her red shoes and fairy wand in her profile pic.)

Clara at  Life in Miniature has the most delightful things! I am besotted with her little books, copied from books of her childhood and reminding me of books from my childhood which I hadn't thought of for years.

I can't find links for Miniature Maid, Little Miss Kris, Nicola McCormick and Latiana (which will embarrasssing if I find later that I am actually following you on a blog and have forgotten) so if anyone can help, please leave a comment.

Thank you all for being interested enough to follow.

Edit: I may have discovered Miniature maids blog at http://miniaturemaid.blogspot.com/ Her profile picture is different but both obviously loving rabbits has to be too much coincidence. Well worth a visit for her needlework as well.

Friday, September 24, 2010

Why you should never ever tidy up!

Today started off well. The sun was shining, the birds were singing and with a song in my heart I decided to tidy up my work corner in the back shed. After a couple of hours I had found the work bench and tools I had forgotten I owned and my miniatures were safely in their plastic boxes waiting to be packed back up on the shelf. A relaxed lunch was followed by chocolate and I decided to do some sewing before returning to finish. Then it was a mad panic to soak up water travelling through the house during a sudden tropical storm. It passed as suddenly as it came and all was still well after much mopping up, so I went out to my shed to admire my new tidy work space. It also had survived the storm, being a well built shed...except one spot...where I had placed my finished miniatures...The safe plastic boxes they live in were filled to the brim with water. Alas, PVA doesn't take well to being soaked for several hours and some items are irretrievable. Books (sob) and paper like water even less and even new items in their little clip lock bags weren't spared. Fabric I think will dry - albeit more rainbow coloured than it had been and after peeling the soggy tissue paper from everything else I can say that the losses could have been worse. (or so I thought until my slightly built daughter walked past and the vibrations caused more furniture to collapse!)

I won't be tidying again in a hurry!


Welcome to my 5 new followers. I will get back and introduce you properly, but for now I have things to dry, furniture to repair and washing to do.

Addit: Something which amused me was trying to work out what some flat whitish rags were? The pillows! They had been filled with salt which of course had dissolved.
Bonus was the $2 shop cupboard with crooked shelves I got as a gift from mr 13 fell apart enough that I can reglue the shelves in straight!

Monday, September 20, 2010

Sidetracking to a 'new' house

When I was 9 or 10 I fell in love with a metal house in the store 'Waltons'. Every time we went shopping I would gaze at it and wish and wish that it could be mine for Christmas. Christmas came and Santa brought more Enid Blyton books and I loved those of course but was still disappointed. I can even remember that it cost $10 which was probably a lot of money around 1970 (my books were $1.55 each - Santa never removed price tags)

I saw it again 30 years later, neglected and rusty in a second hand shop and 10 times the original price and again was disappointed when it wasn't the right thing to get at the time.

Now 40 years later it has come into my possession after an impulse at a local collectable fair,  $1 for each year of waiting. I'm not sure it is exactly the same house I loved so many years ago, Mettoy stopped manufacturing these in 1965, but many of the features are the same - the black and white checked flooring, the soldiers in the nursery and the painted furniture on the walls. The chimney is missing and so are the stairs and the front door knob and when I got home and looked at it properly, I wondered what had I done! I'm not even sure if the garage is original to this house - photos show different garages and to the adult me, it is gaudy but I still can't stop grinning when I look at it.

Among the bag of plastic furniture included were two inhabitants but I think they were just props waiting for the real family to come along and they have moved safely into a box where they can remain forever elegant.

The Bendy family was waiting  patiently in that box and were thrilled to move in with their few bits of nursery furniture. The baby and dogs (black and white scotch whisky terriers) are still to come (from another box) and Mrs Bendy wants to add personal touches like flannelette blankets and toothpaste lid flowerpots but meanwhile she loves her new kitchen and Mr Bendy is proud to be master of the house on his new lounge in front of fire and  the Bendy children are safely tucked in bed sleeping....

I think it is still a childs house and I will let children play with it. Everything is sturdily made and as it still delights the 10 year old in me, I look forward to it delighting little girls to come.
If anyone knows anything about these houses, dolls or furniture, I'd love to hear from you.

Friday, September 17, 2010

Tips for miniature hand pieced patchwork

I have had a few people ask for tips on how to make a patchwork quilt like mine, so here we go.

If you have never done English Paper Piecing before, here is a real size tutorial found on the web - thank you Lizard of Oz . I would recommend printing out all 4 pages and reading several times.

To miniaturise  first pick a simple pattern. If you haven't tried it before, start on something small using squares before you try different shapes - you can always turn it into a cot quilt or a pet blanket. 1/2 inch is a comfortable size and translates to 6 inch squares in real life.

When you are ready to move to shapes this site is excellent for your paper pieces - choose the size you want and print it out! Free printable graph paper 
Before printing make sure you are looking at it at 100%. The measurement is the length of one side, not across the entire piece.

Print out 3 or more pages - one to draw up and colour in your quilt - this will give you an idea of size, although the finished one will end up slighter bigger, and will remind you where you are going if you aren't doing a repeat pattern. Most of my hints will be directed at hexagons now.

For hexagons don't drive yourself batty trying to cut out individual hexagons - cut strips and then trim to shape.

Fabric: Use as fine a weave as possible. I found hankies from our local op shops to be perfect - soft, cheap and very tightly woven. The newer ones are coarse by comparison. Beware before you cut though - some are highly collectable and you could be hacking into something which could fund your entire dollshouse collection - check ebay first. If this doesn't worry you, hack away!
The quilt with 1/2 inch squares  uses patchwork fabric. I wouldn't use this for anything smaller.

Spray starch is now your best friend. Starch like mad until your hanky/fabric feels like stiff paper. This eliminates the need for tacking the individual hexagons when you fold it around the paper and who wants to tack a shape smaller than your little fingernail?! Finger press the folds by pinching.

Don't worry about cutting hexagons from the fabric - squares are fine, make them about 2 1/2 - 3 times as wide as your hexagon. This gives plenty of fold size and some thickness when finished. Trim off any bits that poke out.

Ideally centre your squares around a motif on your hanky - one hanky can usually be used to make numerous different pieces and angling these different ways will give you a new look as well. (see the pink stripe blocks in my quilt) This will require all your squares to be cut with scissors and the hanky will look like it has been through the censors when you have finished. You will need 6 same and 1 different squares for each flower.

Making the flowers: This part is the hardest. You have your 7 wrapped pieces in front of you and you want to be able to do it with one thread, so holding firmly, start by sewing the first outside hexagon to the centre with about 4 or 5 whip stitches. Slip your needle and thread to the top of  this outside hexagon, going  inside the fold, and attach the next outside hexagon on to the 1st outside hexagon, then onto the centre. Slip your needle and thread back to top, making sure you aren't pulling too tight, and attach the next and so on. Once all 6 are joined to the middle, break the thread off and with a new thread tack the outside in place. Put aside and make a few more flowers.
Medallion layout front
Medallion reverse


Once you have done this, you have all the skills needed to join the rest in whatever pattern you want.

When you have your quilt top assembled, undo your tacking and remove all the tiny paper pieces. Some will have already liberated themselves. Keep checking it against a lighted surface because others will remain in hiding. (I still have one tucked away inside) Iron (being careful of your edge pieces) and starch again - it will be limp from handling by now.

Applique it onto a piece of fabric allowing for 1/4 inch seams around the outside and cut a back the same size. Right sides together sew around outside like making a cushion, turn right side out and slip stitch closed.

You can bind it with fine bias binding instead.

If sewing is beyond you, starch some cotton fabric to paper stiffness or iron onto a piece of freezer paper, cut to A4, choose a quilt and run through your printer! Use pellon for padding and quilt.

Please ask questions about anything vague or left out.

  
 I'm not sure how well this will work but here goes:


Click for enlarged image, R-click to copy to your computer and I think you will need to play with the colour if you want to print this quilt onto fabric. It was originally saved in a high resolution, but necessarily the internet has to turn it into a downloadable size.

When printing onto fabric, I have found it better to have the colours too strong as they print a lot more faded.


I am having a hunt for the file for the pink printed quilt as well.


Welcome to my newest followers!
Teresa is an IGMA artisan and her work is amazing - I'm glad I left her introduction til this post as she has just posted the most gorgeous pink sewing machine (!) along with a sewing room of delights. Keep looking back though, some things you need to check twice to see if they are real or mini.


Caroline has 2 blogs - her dollshouse blog with 2 houses - one for her herself and one for her daughter - both gorgeous and real life Forever Vintage with her shabby chic delights and her ups and downs in life. 


Susan has popped by to return my call. When life gets you down, go and visit the chaotic lives of her dolls house residents and have a chuckle. Poor Mother Schoenhut- her family are such a trial to her!

Natalia seems blogless, so please post a comment or contact me if that isn't correct.

As usual when my internet has slowed google translate is the first to suffer, but the pictures speak for themselves at PuNo's Minis I love the detail achieved with humble (and economical) cardboard packaging that is transformed when turned into furnishings.

 Marissa has blogging, following and sharing links and such down to a fine art, as well as working on her own mini projects, so for a look at those plus keeping up todate with who is having giveaways or running tutorials, call in to visit.

Berri and Kate are others who doesn't seem to have a blog so, like Natalia, please contact me if you have a link. .

Carol is a graphic designer and her blog is full of inspiration and resources! She is working on a dollshouse but most of her blog (that I have read so far) showcases other artisans work and gives advice for things we all find useful. Thank you Carol!

Evelien  is making a gorgeous modern 'lived in' house and like me bemoans how little there is to show for the time put in! (we have the same bathroom set too but she is really making something of hers) Have a look a her crochet - I can't imagine how tiny those stitches are! No wonder it is taking more than an evening!

Rosella is my most recent follower and I haven't had time for more than a peek, but that peek has a lot of promise of an enjoyable hour of browsing.


Thank you all for following and I'll look forward to keeping up with what you are doing as well!

Tuesday, September 7, 2010

Easy Cutter - why can't I cut square with it!

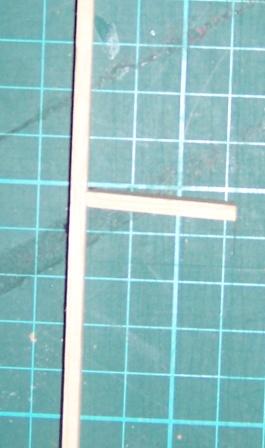
Hi, today I have a grievance. I got an Easy Cutter Deluxe for my birthday last month after months of agonising and studying the different types, emailing sellers to see if they ship to Australia (most don't) and reading woodworking forums for opinions. I did have reservations about the blade shape giving a square cut, but decided either it would adjusted so one side cut square or I was being too picky and any slant would be invisible. Everyone else raved about them so they must be good! Finally I opened it and was able to have a play and my reservations were confirmed.

What am I doing wrong? Why does everyone else not have this problem? (actually the crushing was mentioned on one woodworking forum, but not the slanted cut.)


Note the blade shape - essential for a sharp edge and strength, but the tapering is causing my problem.


 3mm thick obeche attached at the angle it cuts at.   Note: NOT a happy dollshouser! Help needed please!


More positively Spring is here so I will leave you with some garden pics please ignore the giant weed in one - it has spikes and every time I see it I am not up to wrestling with a spiky weed!


Sunday, September 5, 2010

Getting to know you all

Welcome to all my new and old followers. I hope you noticed my garden as you raced inside through the much wanted rain. Sadly it isn't showing its best as so many of the flowers are curled up and hiding from the wet as well. Anyway now you are in, fetch a cup and settle down with a warm drink and get to know each other...


Carolyn's Tutorial: Waterslide Decals
 I haven't anything of my own to share this week but have been finding lots of lovely things online and I know that anyone who hasn't seen it on Carolyns blog already, will love this tutorial! I have often admired all Carolyns little bits which add such character to her rooms and she has let us into the secret. A very very big thank you! And she has a wonderful giveaway on offer too.


 I am sorry to have put off posting for so long, especially when I look and see so many more followers to welcome. Some of you may have noticed me visiting you in return. The things I see are so inspirational and very uplifting!

Josje's A Beautiful World  is indeed a beautiful world. Her roses are to die for and are in keeping with all the elegance and beauty she captures in her other creations.

Jeanette at JRB Creations brings a smile to the world with her little animals small things that you take for granted in real life, but delight when you see them scaled down. She is also busily working away on a dollshouse, but this house is to be a gift for her niece. That is love.

La Petite Sophie  is a small scaled house but you would be forgiven for mistaking it for a real, very nice, lived in home. Roelie has 'wear' fine-tuned to perfection and manages comfort crossed with style just as well.

It was lovely to have Ascension call in. She seems to be one of the socialites of this blogging world and I see her name pop up everywhere. She has a flair for the unusual ...sometimes VERY unusual!

Klara has a few interests but I can't get the one I am longing to see to remain open! Maisonklarameijer . I can open it, get a tantalizing glimpse then it disappears to eternally reload. GRRRR Meanwhile though she has other blogs to enjoy. Scrapbooking, Paris scrapbooking

I love Janice's Diagon Alley shops (current project Witch E T Grubbs Emporium) I would never have room for something like that and given how slowly work progresses on my one house, would never have enough lifetimes either, so I really enjoy looking at what others are doing and doing very well.

Maria (Diary of a Miniaturist)  was a google browsing discovery who followed me back after I had left a comment on her crochet rug. Anyone who liked mine several posts ago needs to visit Maria and for those who love angels, she has  angel in the attic as well.

 Jessica is a DHE friend who is always bursting with ideas and enthusiasm. Her curiosity shop is still in its new stage, so pop in now and you will be able to watch progress from the beginning.

Joe is another DHE friend and I am bursting to say a lot about him, but you will all meet Joe very soon (lips closed now!) Meanwhile have a look at his blogs Alcorn Gardens and Whites Greengrocers and Florists and be amazed at the talent of this high school boy.

Dee's De lightful minis is a fun place to call by. She is working on a wonderful saloon right now and looking at older pics I suspect she will end up with an entire Wild West town when she has finished!

Lara's Miniature World makes me think of the artwork of  Carl Larsson with joyfully coloured furniture and bits that add life to a scene and have so much appeal.

Erin is an interesting follower to find as I can't see any dollshouse connections - maybe a closet dolls houser? She is very talented however and I have really enjoyed looking at her new blog so far (how does someone think of making a 'hello' sign like that and why does it make you smile?) and love her sense of colour as I am sure others will if they call by.

Ana can be found at  My World in Pink and with a name like that who could help but want to visit! Google translate keeps crashing on me, but I suspect I have been overloading it as I want to read and click on the pictures and absorb it all at once! her bedlinen is gorgeous and I am in love with her baby blanket.

Peggy is at Another Cosy Cottage and the name made me smile because so many of us are cosy cottage people, while others like mansions and grandeur. I wonder why we long for one or the other? Anyway, Peggys cottage is very cosy and pretty and homespun, exactly as a cottage should be and I would be pleased to share tea and cake and swap recipes there any time.

I am not usually one for dark magic but Dark Squirrel Victoria somehow includes a quality in her work that gives you a thrill of being somewhere where you need to watch over your shoulder and speak in whispers. Maybe it is because it is such excellent craftsmanship that you know that no ordinary black magic is about to take place. Victoria also has a giveaway if you get there quickly!

I still have to read through Wanda's blog but am pea green at the lovely gifts and swaps she has received in the first 2 pages.

The same for Cindy at Little Bear Paws Nursery. I haven't had a chance for a good read but am absolutely smitten with her little bears and can't wait to read further for the promises of shabby chic. I am also her 100th follower!  (some of us get thrills from very small things.)

Terry is here (and Ascension has popped up in the latest post - did I say that girl gets around!)  I was smitten by Terrys gorgeous orange cat, having a weakness for ginger cats, and I am sure that won't be the only thing we have in common.

Like Christine's 'Rosemyne' My Reality will feed my love of vintage houses (Triang in particular from what I have read so far) Her other blog I opened and thought was an interior design blog...until I looked closer! Wow!

My most recent follower was another who seemed familiar, Sarah Scales, and when I opened and realised she was one of the the incredibly talented and generous artisans who contribute to the free online magazine AIM I realised why. I love your work from there and will look forward to seeing more in your blog.

Susanne and Karin I think have blogs somewhere, but I haven't yet been able to find them, so if anyone else can help, let me know please. I'm sure I remember visiting both!

Saturday, August 21, 2010

Dressed Bed

A quick post between shifts (where did my week off go!) to show you the finished bed and quilt. The quilt is hand paperpieced in the traditional 1930s grandmother's garden design using old hankies (ordinary ones - I started collecting for this project and most were just too nice to cut up, so I now have a lovely hanky collection!) and fussy cutting each hexagon.The pillows are from the remnants of an old white trimmed hanky and show some wear despite using the best bits (it was the same problem with the white hankies I collected- too good to use) but wear would have been appropriate immediately following the war. Overall I was quite pleased with it. Now I just need a bedroom!

Welcome to my new followers. I can't believe there are nearly 50 now. I have been popping in to your blogs during the week and, as usual, am amazed at the talent there is out there!

Mini babies aka Pattyis a very talented baby maker (of the miniature variety and with one of her own of the standard size!) Her page also contains useful links to giveaways and tutorials, so worth a visit on many levels.

Teresa has snippets about her garden and other activities as well as her dolls houses and minis. An excellent bargain hunter (I am green with envy at her mini purchases!) and a woman after my own heart with her love of her garden as well.

Josje I will need to return to. The internet is having a hissy fit and won't let her load for me.

Looking glass miniatures has a few blogs to check out depending on your fancy:  1/6 scale  . Apothecary 
Hobbit house My favourite was the Apothecary until I saw the so cute tiny mail she is working on in Looking Glass Miniatures How do people keep up with 4 blogs and still have time to mini?!

Jody has lots of creative stuff to admire! She has made objects with beads I would never have thought of, but loved. I enjoyed reading her a few days ago, but google translate has gone bung on me tonight (and our provider has slowed us to 64 kbs AAARRRGGGHHH)

Emilie is a must to visit as well for the really pretty. Currently everything is in French (see above) but the pics are well worth drooling over.

My 49th follower has disappeared with my followers list, but I will catch up with you!

Meanwhile I have a blog for the lovely Christine of Rosemyne who has the Triang house I have always dreamed of owning and is repairing it from a windowless shell to the thing of beauty it was always meant to be.


This quick post has taken forever thanks to our internet, and the husband is getting restless so I better head off. Have a wondeful week everyone. :)

Sunday, August 15, 2010

Making the bed


Two posts in two days! Can you tell I have a week off!

I have been wanting to get on with making this bed since I began making a quilt for it months ago so it was lovely to have several hours yesterday to do so, especially as I need it for a craft display next week (which also requires finishing the aforementioned quilt) This one is for my family's twin girls, Daisy and Violet to share and was in the house when the family inherited it from the father's godmother.

I began raiding Miss 18's beads and topped this up with a mixed bag from ebay. I then hunted out 2 old wire coat hangers (they are thicker than the newer ones) and found various pieces of wire for the decorative bits. Nearly every bead needed another hole drilled in it - painful task and it was ready to be assembled. I had snagged a few pics from an online antique shop of old beds (as well as having 3 cast iron beds in our house) and the design I chose probably wasn't the easiest (curves are more forgiving than straight lines) and not the prettiest, but was the one that I felt was right and I could imagine the house children climbing through the gap at the top. Lots of superglue gel and a little swearing as I coated my fingers and wires didn't behave and I was finished the ends!


Proudly I showed my children (with satisfying oohs and aaahs) and my husband (who is still waiting for me to pass through this regressive stage and return to adulthood) who quite happily commented that the end must be in sight - hmmmm should I disillusion him?


I still need to prime and paint it (I think quick drying spray paint will be needed) but I liked the metallic look and know that when it is painted all the bumps, lumps and rickety bits will show up more, still what can you expect of a bed with 4 children jumping on it! Plus anyone who is thinking about making one can see the process better. If you are going to make one, I would recommend plastic rather than metal beads.

While on wirework, the hooks on my coatrack were made from head pins -  the type with the round head although a flat head would work well too.(The original Jane Harrop coatrack had wooden pegs)  Fold the pin in half, bend to your shape and  fold the tail back at right angles to insert and glue into a hole drilled in the wood. Close the folded bit together, the illustration is to show the shape. Easy Peasy and very economical!

Welcome to a new follower as well! Maria at http://marivigano.blogspot.com/  I love her red house (miniature) and all her orphan animals (real life) Followers aren't being accepted at the moment, but have a look anyway.